Creating prim animations in Second Life
February 14th, 2009
You learned to create avatar animations using Qavimator.
But how can we make prims move? Prim Puppeteer was created just for that! And you can create your animations directly in Second Life, for better accuracy and even more enjoyment!
Here are some instructions on how to get prim puppeteer and how to use it.
Get Prim Puppeteer:
First, you will need Prim Puppeteer.
To get that, you need to teleport yourself to XD Fusion: (211, 183, 91).
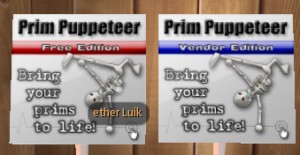
Once you are there, turn to your left to enter the small house. (Just follow the big arrow in front of you) You will see the Prim Puppeteer Free Edition and Vendor Edition.
Next, touch the Free Edition and you will be given an object called Puppeteer – Free Edition v6.5 Mono.
You can then come back to Abtec (or anywhere there is a sand box) and rez that box. In the folder created, you will see, among others, 3 scripts and a guide.
The way to setup this is very easy:
1. Create your prim/s.
If you have multiple prims, be sure that they are linked and that the root prim (the one that gets highlighted in yellow instead of blue) is the piece that you want. This root prim is important as it becomes the main piece = moving this root prim will move all the others along, just like the Pelvis on the avatar.
If you want to, you can create an invisible box and make it the root prim.
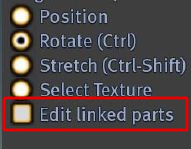
2. Check the Edit linked parts when Editing your object and Select your root prim.
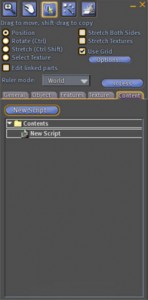
3. Go in the Content tab of the Object Edition Window.
4. Drag and drop the 3 scripts named Puppeteer Editor, Puppeteer Engine and Puppeteer Link.
5. Right click the object and select ‘Take’Â then re-rez the object back out from your inventory.
6. Right click the object and select ‘Edit…’Â then select ‘Tools -> Set Scripts to Running in Selection’ from the top menu bar.
Then just follow what is said in the Notecard that appears in the top-right corner.
How prim puppeteer works:
Once the scripts have been activated, you need to enable the menu. To do so,
1. right-click on your object and select Edit.
2. Type /32 menu in your chat box. You will see a notecard with options appear in the top-right corner.
Then, be sure to select “Edit linked parts” in the Object Menu.
Take a screenshot of the first frame by clicking the “Record” button in the top-right menu.
You can now move the parts you want to move and take a screenshot for each pose needed (for each keyframe). Everytime, you need to record the frame.
You can preview your animation by pressing the “play” button. By default, there is a delay of 1 second between each frame. You can change that by pressing Trigger, then Edit, choose your animation trigger type, next, choose your playback type, then edit-delay.You can then record a new value. But remember that the minimum value is 0.4. This means that there is a minimum of about half a second between each frame, which is fairly slow. Nevertheless, the in-betweens will be created, so the animation will not look as jaggy.
Once you are done, you just need to Publish your animation. Only then will the chat-triggers be enabled and other options too. This will not prevent you from editing again your animation.
You can do that by just drag and dropping the Puppeteer Editor script back in the root prim’ Content tab.
Hope this helps!
Categories: animation, Second Life |


