June 29th, 2009
Here are the instructions for you to set up and be ready to continue working on this project!
1.Transfer the files from the CD to your computer:
[CD/DVD_Drive_letter]:RiseOfTheLegendsDM-Skins.ut3
to C:Documents and Settings[your_account]My DocumentsMy GamesUnreal Tournament 3UTGameUnpublishedCookedPCMaps
[CD/DVD_Drive_letter]:RiseOfTheLegendsPackagesSkins.upk
[CD/DVD_Drive_letter]:RiseOfTheLegendsPackagesSkins_Trees.upk
[CD/DVD_Drive_letter]:RiseOfTheLegendsPackagesSkinsSound.upk
to C:Documents and Settings[your_account]My DocumentsMy GamesUnreal Tournament 3UTGameUnpublishedCookedPC

2. Start Unreal Tournament 3 Editor:
Start>Unreal Tournament 3>Unreal Tournament 3 Editor

3. Open the Generic Browser (if it is not already opened)

4. Open the packages you just moved: (If they are not already loaded in the generic browser)
(you can ctrl-select to add to your selection and choose them all at once)
Skins.upk
Skins_Trees.upk
SkinsSound.upk


5. Open the Skins.ut3 map located at C:Documents and Settings[your_account]My DocumentsMy GamesUnreal Tournament 3UTGameUnpublishedCookedPCMapsSkins.ut3


Then you are ready to work!
You can preview the game by pressing the PlayerStart button at the top to start where the player will start…

…or right-cliking in your 3D viewport and selecting “Play from here” to start wherever you want in the level.

Enjoy your modding!
Categories: Game Development, Unreal Engine, Unreal Mods |
Comments Off on How to get started with the files you received
April 20th, 2009
Here is a tutorial on how to get the texture on your model. Also on how to do UV mapping in Blender if you are interested, just keep in mind that we [the abtec team] are doing the UV mapping for you.
 (more…)
Categories: 3D Modelling, Blender, Game Development, Tools |
Comments Off on Basic UV mapping in Blender
April 20th, 2009
Here are the UV mapped image of your meshes.
Arrow_01.tga
Bow_01.tga
Coal_01.tga
Pottery_01.tga
All there is to do is to texture them. Once that is done, we’ll go ahead with the animations!
Cassandra
uvtemplates
Categories: 3D Modelling, Blender, Game Development |
Comments Off on UV templates
March 16th, 2009
Play: Tutorial
This is where the player learns how to use his weapons.
VOICE OVER: How to use the bow & arrow. Example: “Press A to use the bow & arrow.â€
As you walk along, you come to a body of water. There is a canoe on the shore. You get into the canoe [and start floating]. The evil villager from the Flying Head legend rises out of the water. Two Baby Flying Heads are attached to him [with leather ropes. Or maybe hair.] They are attacking you [how?]. You shoot them with your bow.
(more…)
Categories: 3D Modelling, animation, Game Development, Schedule, Tools, Unreal Mods |
Comments Off on Rise of Legends: Skawennati’s Notes
March 11th, 2009
Dawson has three game design-related programs:
There are also 3D Modeling programs at Cégep de Matane and Cégep du Vieux Montréal.
All three are partnered with Ubisoft in a consortium called CampusUbisoft that also includes Université de Montréal‘s diploma in Game Design and Université de Sherbrooke.
Categories: 3D Modelling, education, Game Development |
Comments Off on Game Design Programs in the Montreal Area
March 10th, 2009
Here is the Gantt chart that shows the steps that needs to be taken to complete the Second Life project

Gantt chart of the steps
Categories: Game Development, Second Life, Tools |
Comments Off on Gantt chart for the Second Life project
March 9th, 2009
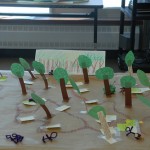
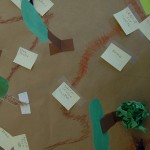
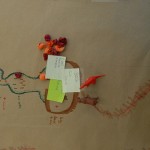
Here are the comments made by Jon and Chris from the play test last week along with a few images.
Paper Prototype Play Test: Rise of the Legends: Legends of Fear
Play Testers:
Chris (a student in Computational Arts and a former pro-gamer)
Jon (From Toronto, a visiting artist in residence at Oboro, filmmaker, educator)
(more…)
Categories: education, Game Development, Tools |
Comments Off on Paper Prototype Play Test
February 25th, 2009
Here is the Game Design Document created by the Rise of the Legends (Legends of Fear) team…
(more…)
Categories: Game Development |
Comments Off on Rise of the Legends (Legends of Fear)


